雙 PC Card
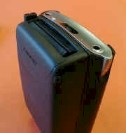
擴充背匣
Compaq 終極擴充背匣
Part
Number 216198-B21
 H3630
有幾種己經存在的擴充背匣,
如 CF 擴充背匣, PCMCIA
Card 擴充背匣. 同一時間, 您只能使用一種擴充匣..
這只新款的雙槽 PCMCIA 擴充背匣 Dual-Slot
PC Card Expansion Pack
將使您的 H3630
具有同時使用兩種擴充卡的新功能, 您可以使用兩種 Type II
或是一個 Type III 的 PC Card.
經由轉接卡, 它也可以使用於 CF 界面的設備. 您的
H3630 必需先升級到 Rev 1.69
或更新的版本才能使用這只擴充匣, 而中文版的 H3630 將沒有升級的問題.
升級的資訊可以
由此下載 .
H3630
有幾種己經存在的擴充背匣,
如 CF 擴充背匣, PCMCIA
Card 擴充背匣. 同一時間, 您只能使用一種擴充匣..
這只新款的雙槽 PCMCIA 擴充背匣 Dual-Slot
PC Card Expansion Pack
將使您的 H3630
具有同時使用兩種擴充卡的新功能, 您可以使用兩種 Type II
或是一個 Type III 的 PC Card.
經由轉接卡, 它也可以使用於 CF 界面的設備. 您的
H3630 必需先升級到 Rev 1.69
或更新的版本才能使用這只擴充匣, 而中文版的 H3630 將沒有升級的問題.
升級的資訊可以
由此下載 .
我的情況是以 GPS 導航應用中的電子地圖軟體為主的, 由於詳細的地圖檔案往往會超過 30 幾 MB. 因此 CF 儲存卡對我是必要的. 而我們也經常會使用到 CF 界面的 GPS 接收機, 沒有兩個插槽的話, 就必需將地圖資料分割部份來安裝在 Pocket PC 上. 不然, 就必需使用之前的連接線經由 Pocket PC 下方的 RS-232 來連接. 多餘的連接線有時會不方便. 另外, 我的無線電網路卡 X-300 應用在掌上型的電腦無疑是行動裝置最有價值的特點.這個擴充匣中所具備的獨立鋰電池也另網站卡及 GPS 設備有自己的電源供給, 不會因此減少 PDA 使用的時間. 另外, 由於工作上的需要, 我經常需要對考 CF 儲存卡. 之前最快的方法是買兩個 CF 讀卡機在 PC 上完成對拷, 或使用轉接卡由 NoteBook 的 PCMCIA 槽對拷. 現在我則是直接經由轉接卡在 H3630 上對拷.
 經常需要作簡報的人,
也許想使用 H3630 來連接投影機. 是的,
PCMCIA Type II 的 VGA
擴充卡正是因應這種需要而產生的. 但是, 簡報所需要的資料檔中, 通常少不了大量的影像檔案, 沒有額外的儲存卡, 想要靠 H3630
內部僅存的記憶體來玩是不夠的. 解析度更大的
PCMCIA VGA 卡或是需要更大的資料量傳輸的影像補卡, 就可能需要 Type III
的插槽, 目前; 即使是較大型的 H/PC 都可能沒有這種擴充的方案.
CYNET Complete Wireless Cell/Modem 提供了一款使用 Type III 界面的行動電話模組.
螢幕展示
|
|
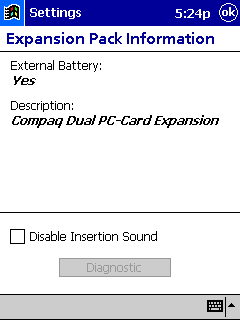
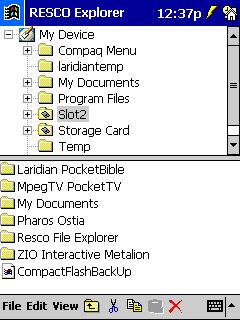
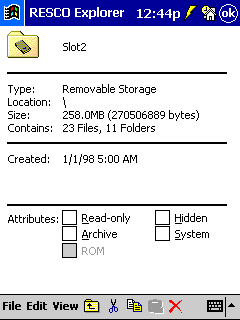
使用兩只 CF 記憶卡的情況下. 系統顯示第二片 CF 卡為 Slot2, 在中文版下也是如此, 而原來的第一片卡會顯示成儲存卡 |
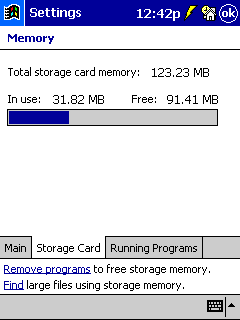
只有第一片卡上的記憶會顯示於 Start/Settings/System tab/Memory/Storage Card tab/ |
|
|
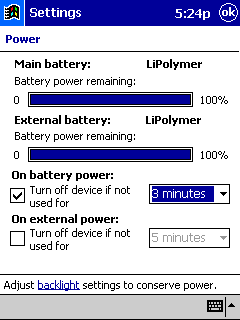
| 擴充後的兩只電池存量都會顯示. |
近距離觀察
|
|
|
| 安裝了擴充槽後, 從上面的角度觀察, 兩個槽均有一防塵蓋. 另外一側為電池充電顯示 LED. | 從下面角度觀察, 可以看到一獨立的充電孔 |
|
|
|
| 比較三種擴充背匣, 左後方的是裝置了雙槽背匣的 H3630. 右後方的是裝置 CF 擴充背匣的. 前方的是單 PCMCIA 槽背匣 | Here is the naked iPAQ looking like it is on a diet compared to big brother. |
|
|
|
| Top view comparison of CF pack next to Dual-Slot pack | Side comparison of CF pack next to Dual-Slot pack |
|
|
|
| Top view comparison of PC Card pack next to Dual-Slot pack | Side comparison of PC Card pack next to Dual-Slot pack |
|
|
|
| Teletype PC Card GPS plus my Storage memory for holding all the maps! | Imagine using your Sierra Wireless AirCard AND still use your Storage Card |
|
|
|
| Going with my Intel PRO/Wirless 2011 LAN PC Card and still using the Storage Card. | |
An Inside Look
OK who wants to see what the guts of this beast looks like? Well, you know me and I just couldn't stand wondering what this thing had inside its belly. Dismantling it is a piece of cake by simply removing a few screws and then popping off the protective back cover. This is typical of the high quality that one expects from Compaq. It is well made.